


I really LOVE this project. There are endless possibilities for design and décor… you can build your dream house, try out designs you’d never do ‘in real life,’ and more than anything… have a blast.

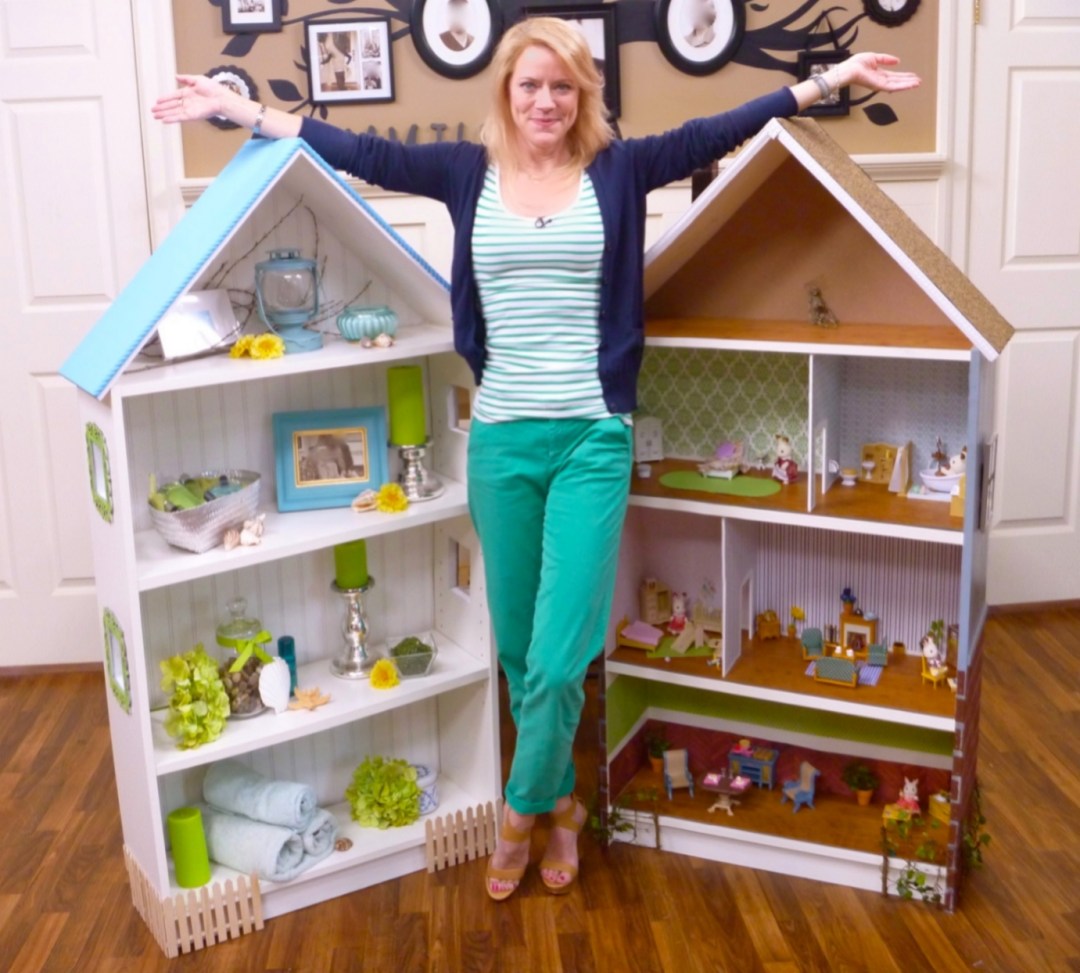
When I began this project, I had intended to make a Dollhouse Bookcase… rather than a Bookcase Dollhouse. (One being a place that looks like a house, where you can display books and objet d’art, the other being a house for dolls that is made from a bookcase.) But as the pieces progressed, I decided to make one of each. (Click here to see video of the bookcases on Home & Family!)
Variations I’d seen were very pink and very fancy, and designed for a little girl’s bedroom. I wanted to stretch the capabilities of a cabinet. Who says a boy can’t have a place to house his books? Why can’t a chic city-dweller use this architecture-inspired repository to shelter her curios?
A beach cottage and a brownstone house were my choices.
Beach House Materials:

Photo: Ikea
White Ikea “Billy” 41 ¾” tall Bookcase (or comparable)
4 Foot Pine Board 1” thick by 12” wide (NOTE as this is “dimensional lumber,” the actual size of a 1-by-12 is ¾” x 11 ½”. Go figure.)
4 Foot piece of Decorative Molding
Picture frames for Windows
Screws
Wood Glue
Glue Gun
Paint
Wood Putty
White Spray Primer
Acrylic Paints – Turquoise, Apple
Laser-cut picture frames
Wooden craft sticks or popsicle sticks/tongue depressors
Bead-board style panel
Assembly:
To cut holes for windows, measure and mark outsides of bookcase. Drill 2 holes at opposite corners inside the border, to create starting point for jigsaw blade. If using the Ikea bookcase, I highly recommend taping the surface of the board, to reduce tear-out of the board finish.


For a more finished look, putty and paint the inside “sills” of the windows. Remove tape. Glue picture frames to outside.
To make Roof:
Cut 1” x 12” in two pieces, one at 24” long, one at 23 ¼” long.

Drill 3 holes along the short face side of the 24” board.

Butt the shorter board up against the longer one at a perpendicular angle, drill pilot holes.


Glue the two boards together, secure with screws. Putty holes if desired.
Prime and paint.
Cut decorative fascia molding and attach to front of roof edge, using hot glue.

Screw roof onto bookcase house at inside corners of bookcase.

Lay bookcase house atop bead board panel, square up cabinet. Trace outline onto bead board, remove house and cut along outline.

Attach to back of house with screws (best to drill pilot holes before screwing).

To make fence pickets, cut rounded edges to a point, and straight cut the opposite end.

Glue fence pickets along the side of house.
Adorn with shells, sea glass, etc.


Brick Cottage Materials:
White Ikea “Billy” 41 ¾” tall Bookcase (or comparable)
4 Foot Pine Board 1” thick by 12” wide (NOTE this is “dimensional lumber,” but the actual size of a 1-by-12 is ¾” x 11 ½”. Go figure.)
4 Foot piece of Decorative Molding
Picture frames for Windows
Screws
Wood Glue
Glue Gun
Paint
Cellulose Sponge
Gray Spray Primer
Acrylic Paint – Brick Red, Chocolate Brown
Roofing material
Wood 2” x 2” cut at 8” long at 45° angle
Trellis fence material
Ivy
Assembly:
Apply gray primer to exterior sides of bookcase. Let dry.
To make brick detail, cut cellulose sponge with a serrated knife to 4 ¼” x 1 ½”.

On a ceramic or plastic plate, pour out brick-colored acrylic paint, spread out on plate. Add a few drops of chocolate brown to add dimension and variation in brick color. Dip sponge into paint to cover the stamp ‘face.’

Beginning at the bottom of side of bookcase, place sponge “stamp” to create first row of bricks. About ¼” to ⅜” away, apply another sponge stamp of paint. Repeat, until first row is complete. Re-apply paint as needed to fill any gaps or blank spots.
To make next row, place sponge ¼” to ⅜” above the top of the first brick line, and center the sponge above the ‘grout line’ of one of the bricks from the first row. This will give your wall a staggered brick look. Continue with the rest of the row. Repeat until the bottom half of the house is covered in bricks. Let dry.
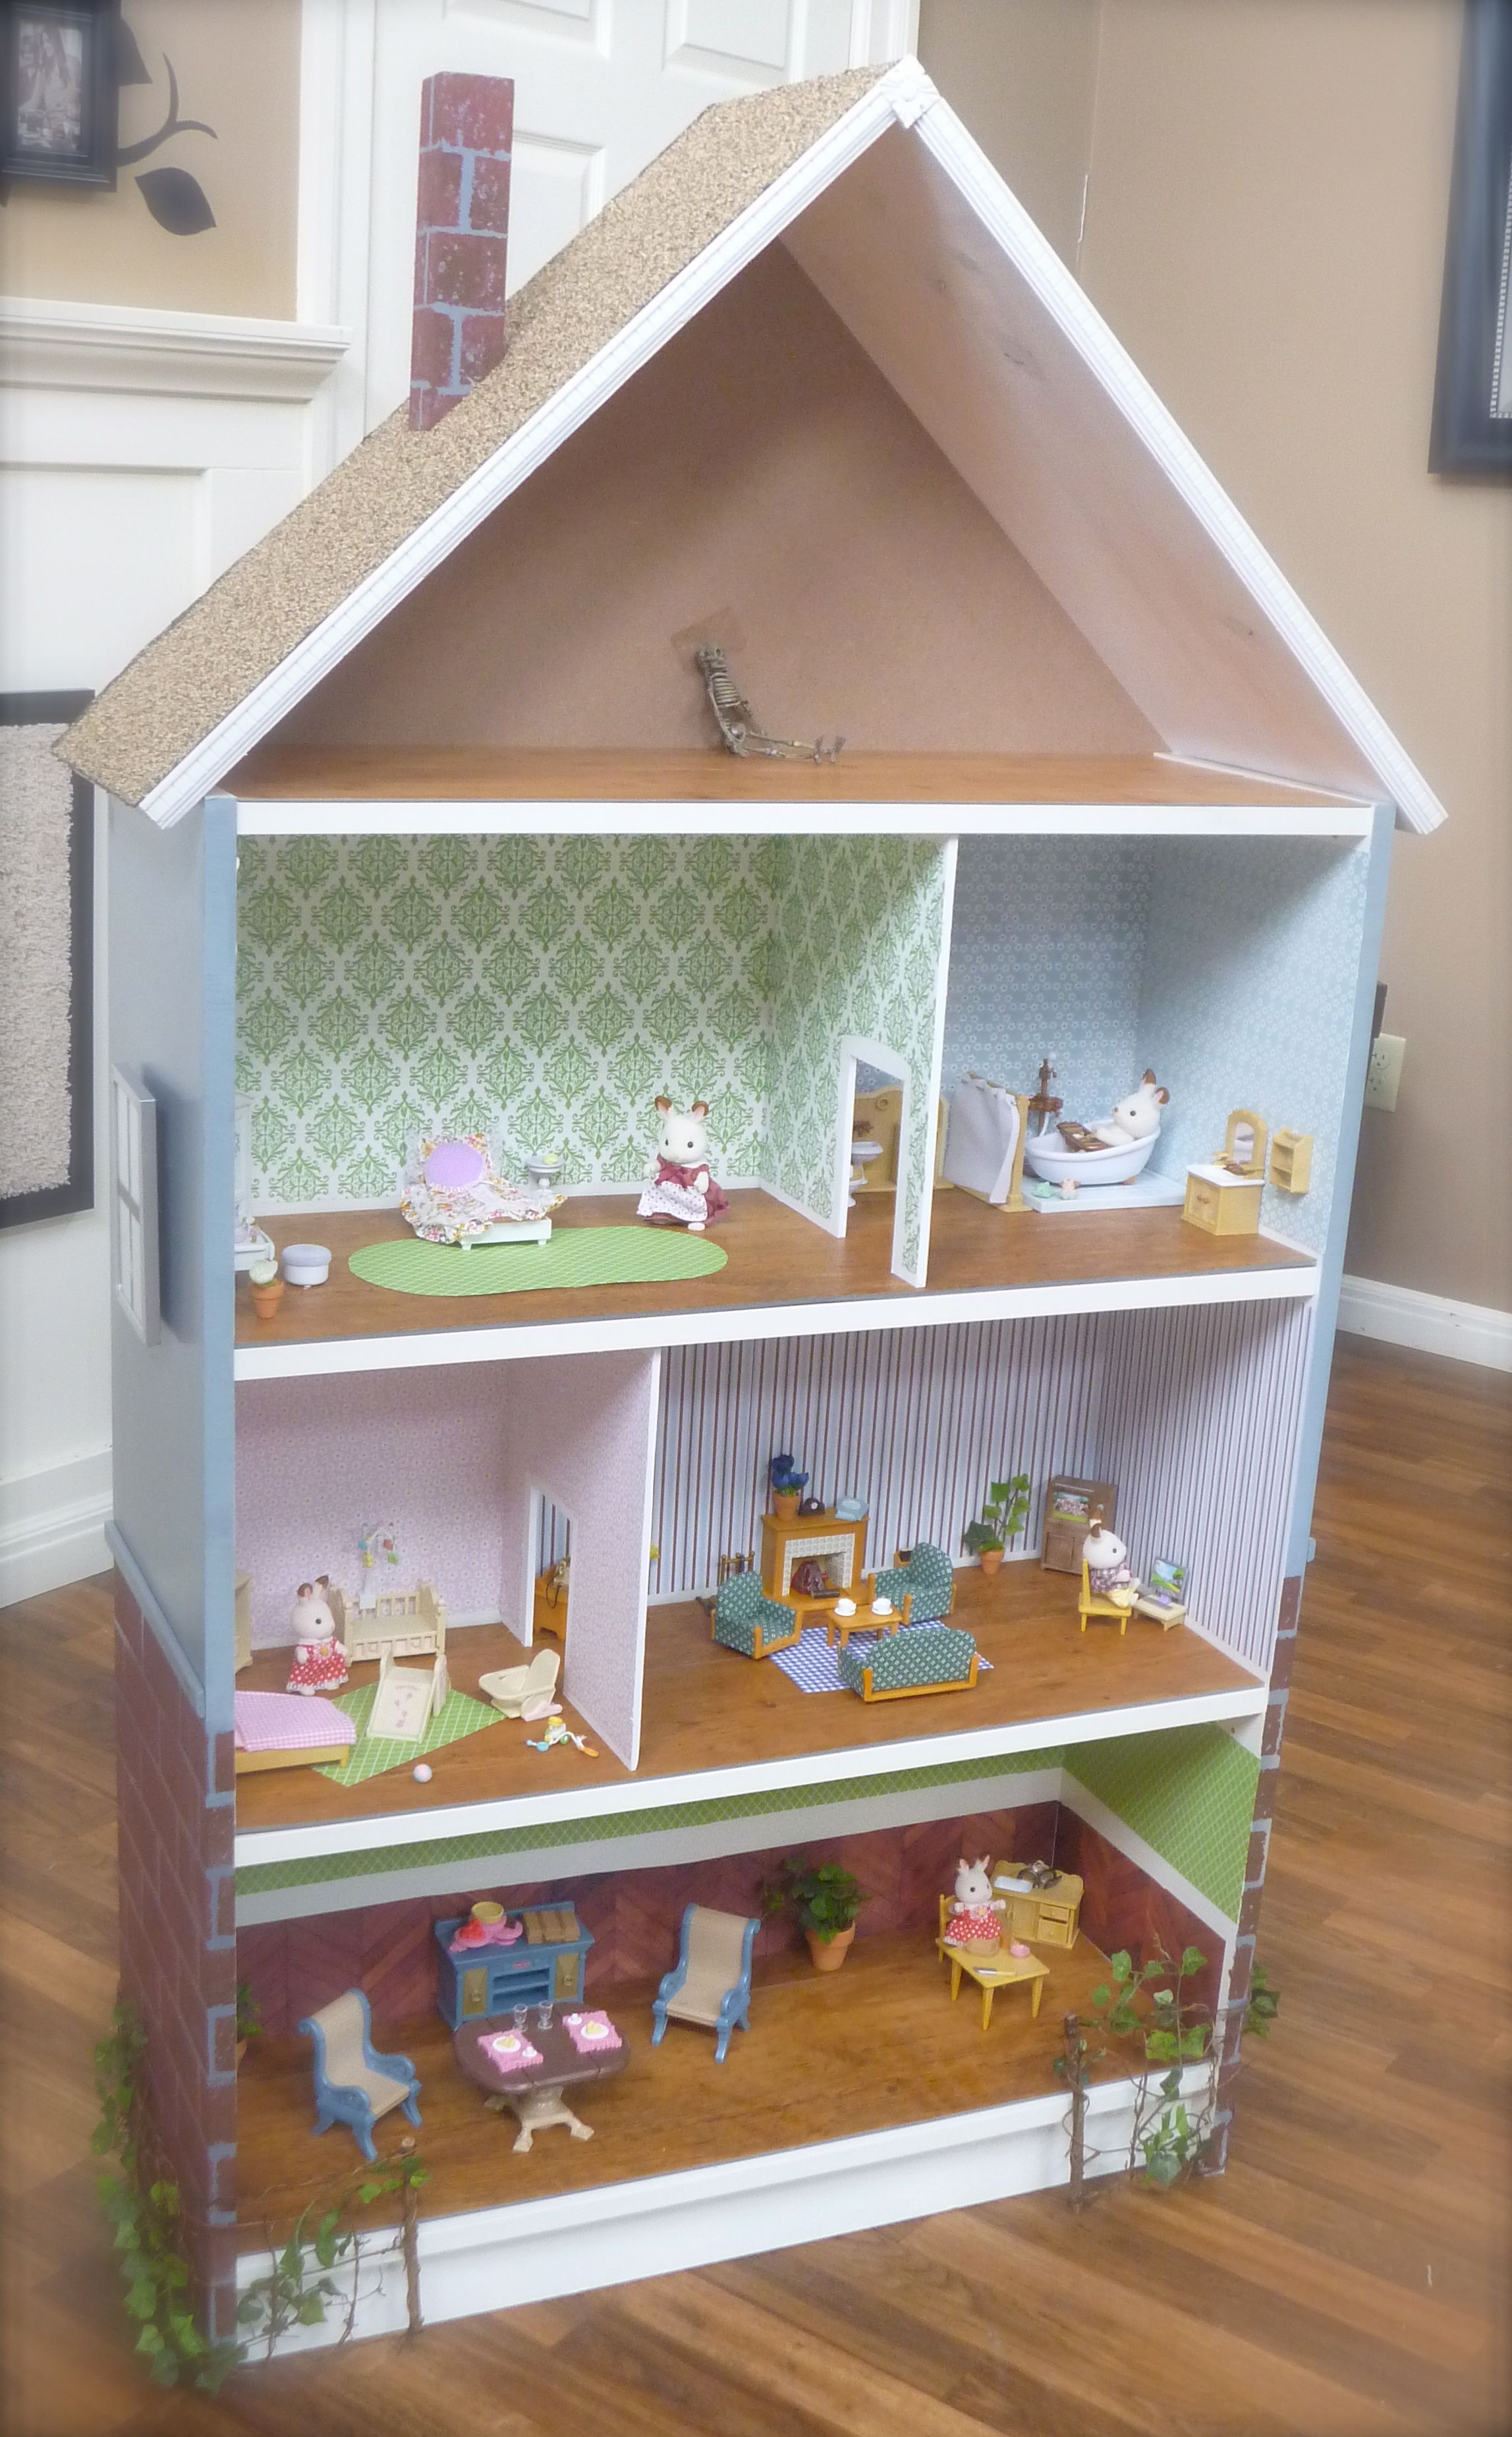
To make Roof: (Same method as Beach Cottage, above.)
Cut 1” x 12” in two pieces, one at 24”long, one at 23 ¼” long.
Drill 3 holes along the short face side of the 24” board. Butt the shorter board up against the longer one at a perpendicular angle, screw the two boards together. Putty holes if desired.

Cut roofing material to size, adhere with hot glue.

To make chimney, paint pre-cut eight inch wooden 2“ x 2” using brick pattern. Attach to roof with screws.
Adhere picture frames to exterior ‘wall’ for windows.


Make your own trellis fence, or find at a craft or hobby store. Secure to house and weave in faux ivy.


Use scrapbooking paper as wallpaper. I even had vinyl flooring scraps for the floors!

I envision making a series of these… seven-foot bookcases, lined up side-by-side, each decorated a little differently. Use as bookcases, maybe fashion some bookends that look like railings… add some steps… a perfect row-house neighborhood in my own library. A gal can dream, can’t she?

Wait. Is that a skeleton in the attic?! Enjoy!